
Oreo Famous Chocolate Wafers Won’t Stack? Here’s the Fix
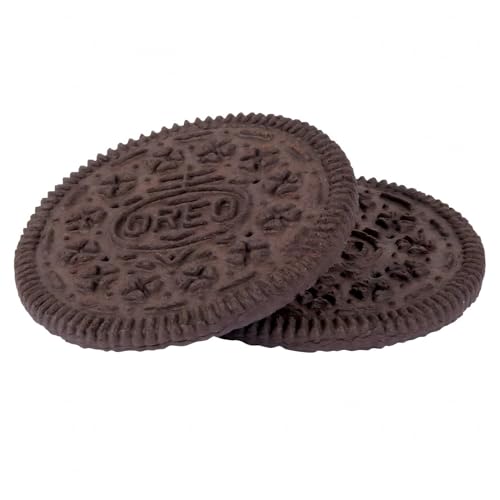
Few things frustrate a baker more than spending time on a beautiful icebox cake only to have the wafer layers slide apart before the dessert even reaches the refrigerator. The Oreo wafers stacking problem has puzzled home bakers for years, and the culprit is almost never the cookies themselves.
We’ve heard from thousands of Nabisco fans who thought they were doing something wrong when their chocolate wafer desserts refused to cooperate. The good news is that most stacking issues come down to a handful of fixable technique mistakes, and once you know what to look for, your layered desserts will hold together beautifully every time.
Why Surface Moisture Matters More Than You Think
The single biggest reason wafers slide apart is insufficient moisture on the cookie surface before stacking. Oreo Famous Chocolate Wafers are designed to soften gradually as they absorb liquid from the filling, but that process requires direct contact.
If you’re spreading filling onto a completely dry wafer and immediately adding the next layer, the cookies have nothing to grip. The filling sits between two hard surfaces with no adhesion developing until hours later. By that point, gravity and handling have already caused the stack to shift.
The fix is simple: lightly brush or dab each wafer with milk, cream, or liqueur before you add any filling. Even a thin coat of liquid gives the cookie surface just enough tackiness to hold the filling in place while the dessert sets. You’ll notice the difference within minutes as the stack firms up instead of sliding.
Filling Consistency and the ‘Slip Factor’
A filling that’s too runny will always cause stacking problems no matter how carefully you assemble the dessert. Whipped cream straight from the bowl, for example, contains so much air and moisture that it acts as a lubricant between wafer layers.
The ideal filling has enough body to stay put when spread—think softened cream cheese, stabilized whipped cream, or buttercream that holds a peak. If you’re working with a lighter filling, add a tablespoon of cornstarch or a packet of whipped cream stabilizer to give it structure.
Thickness Guidelines
Aim for a filling layer about one-eighth to one-quarter inch thick. Any thinner and the wafers make direct contact in spots, which prevents them from softening evenly. Any thicker and the weight of upper layers squeezes filling out the sides, leaving gaps that let the stack shift. A small offset spatula makes it easy to spread filling to a consistent depth across each wafer.
Temperature and Timing During Assembly
Room temperature matters more than most bakers realize. If your kitchen is warm—above 75°F—fillings soften and wafers absorb moisture too quickly, which can cause the stack to slump before it’s fully assembled.
Work in a cool kitchen whenever possible, and if you’re making a tall dessert, refrigerate the base layers for ten minutes after every third or fourth wafer. This pause lets the bottom of the stack firm up so it can support the weight of additional layers without buckling.
Conversely, if your wafers or filling are too cold, the filling won’t spread smoothly and the cookies won’t begin softening on schedule. Let refrigerated ingredients sit at room temperature for fifteen minutes before you start building. The Nabisco Famous Chocolate Wafers we use in our test kitchen perform best when assembled at a moderate room temperature with chilled but spreadable filling.

Handling and Storage Before the Dessert Sets
Even a perfectly assembled stack can fail if it’s moved too soon. Icebox cakes and wafer desserts need at least four hours in the refrigerator before the cookies soften enough to bond with the filling. During that time, avoid tilting the dish or sliding it across shelves.
If you’re transporting a wafer dessert, assemble it in the dish you plan to serve it in, and don’t attempt to transfer it to a platter until it’s fully set. A metal spatula slid underneath too early will shear through layers that haven’t yet fused together.
Covering the Dessert
Always cover the assembled dessert loosely with plastic wrap before refrigerating. Direct contact with wrap can pull at the top layer and cause it to shift, but leaving the dessert uncovered lets it dry out, which slows the softening process. Tent the wrap over the dish or use a cake dome if you have one.

When to Consider a Different Wafer Shape or Product
If you’ve followed every guideline above and still encounter stacking issues, the problem may be the dessert format itself. Some recipes—especially those calling for vertical or angled wafer arrangements—fight the natural way these cookies soften and settle.
Traditional flat-layered icebox cakes work with the wafer’s design, while architectural or sculptural desserts often require a sturdier base cookie. For recipes that demand more structural integrity, consider starting with a different Nabisco option that’s baked to hold shape under weight.
Readers comparing cookie stability for layered desserts often reference our Oreo vs Chips Ahoy: Which Nabisco Cookie Stays Fresh Longer? guide, which covers how different formulations handle moisture over time. That same moisture-absorption principle determines how well a cookie performs in a stacked dessert, so understanding your cookie’s characteristics helps you choose the right recipe in the first place.
Building Wafer Desserts That Hold Together
Most stacking problems come down to moisture management and patience. When you lightly dampen each wafer, use a filling with enough body to stay put, and give the dessert time to set in the refrigerator, you’ll end up with a stable, sliceable dessert every time.
The techniques above work for everything from simple two-layer icebox cakes to elaborate multi-layer creations. Once you’ve practiced the basics a few times, you’ll develop an instinct for how much liquid and filling each layer needs, and stacking issues will become a thing of the past.
Common Questions About Wafer Stacking Issues
If the dessert hasn’t set yet, you can gently press down on the top layer to realign the stack, then refrigerate it immediately without moving it again. Once the wafers have softened and bonded with the filling—usually after four to six hours—the structure locks in place and won’t shift further.
If the dessert has already set and layers are misaligned, the best fix is to serve it in scoops or squares rather than trying to restack it. The flavor will be just as good even if the presentation isn’t perfect.
The filling type matters less than its consistency. Cream cheese frosting, stabilized whipped cream, buttercream, and even thick pudding all work well as long as they hold their shape when spread.
Avoid fillings that are mostly liquid or that separate easily, such as plain whipped cream without stabilizer or custards that haven’t been thickened properly. A filling that can hold a soft peak will always perform better in a layered wafer dessert.
Wait at least four hours after assembly, though overnight is ideal. The wafers need time to absorb moisture from the filling and soften to a cake-like texture.
If you cut too early, the layers will still be distinct and may separate when sliced. After a full refrigeration period, the wafers and filling meld together into a cohesive dessert that slices cleanly.
Yes, and in fact most wafer desserts taste better after sitting for twelve to twenty-four hours. The extended time allows the cookies to soften completely and the flavors to blend.
Don’t assemble more than two days ahead, though, as the filling can begin to break down or the wafers can become too soft and lose their structure. For best results, make the dessert the night before you plan to serve it.
Stale wafers actually absorb liquid faster than fresh ones, which can cause them to become soggy before the stack sets properly. If your wafers seem dry or stale, brush them with slightly less liquid than usual and assemble the dessert quickly so all layers soften at the same rate.
Store unused wafers in an airtight container or resealable bag to keep them fresh between uses. Properly stored wafers maintain their texture for weeks and perform consistently in layered desserts.
Assemble the dessert in a dish with high sides that come close to the top layer, which prevents lateral movement. A springform pan or a deep cake pan works well.
You can also refrigerate the dessert until it’s fully set, then wrap the entire dish tightly in plastic wrap before placing it in a larger container or box for transport. Keep the dessert level and cold during travel, and avoid removing it from the refrigerator until you’re ready to serve.